Quick Start
Get MouseMaster working in 5 minutes.
Step 1: Open the Module
Navigate to Modules > Utilities > MouseMaster.
Step 2: Select Your Mouse
In the Mouse Selection section:
Choose your mouse model from the dropdown
If your mouse isn’t listed, select “Generic 5-Button” or click “Detect New Mouse…”
Step 3: Choose a Preset
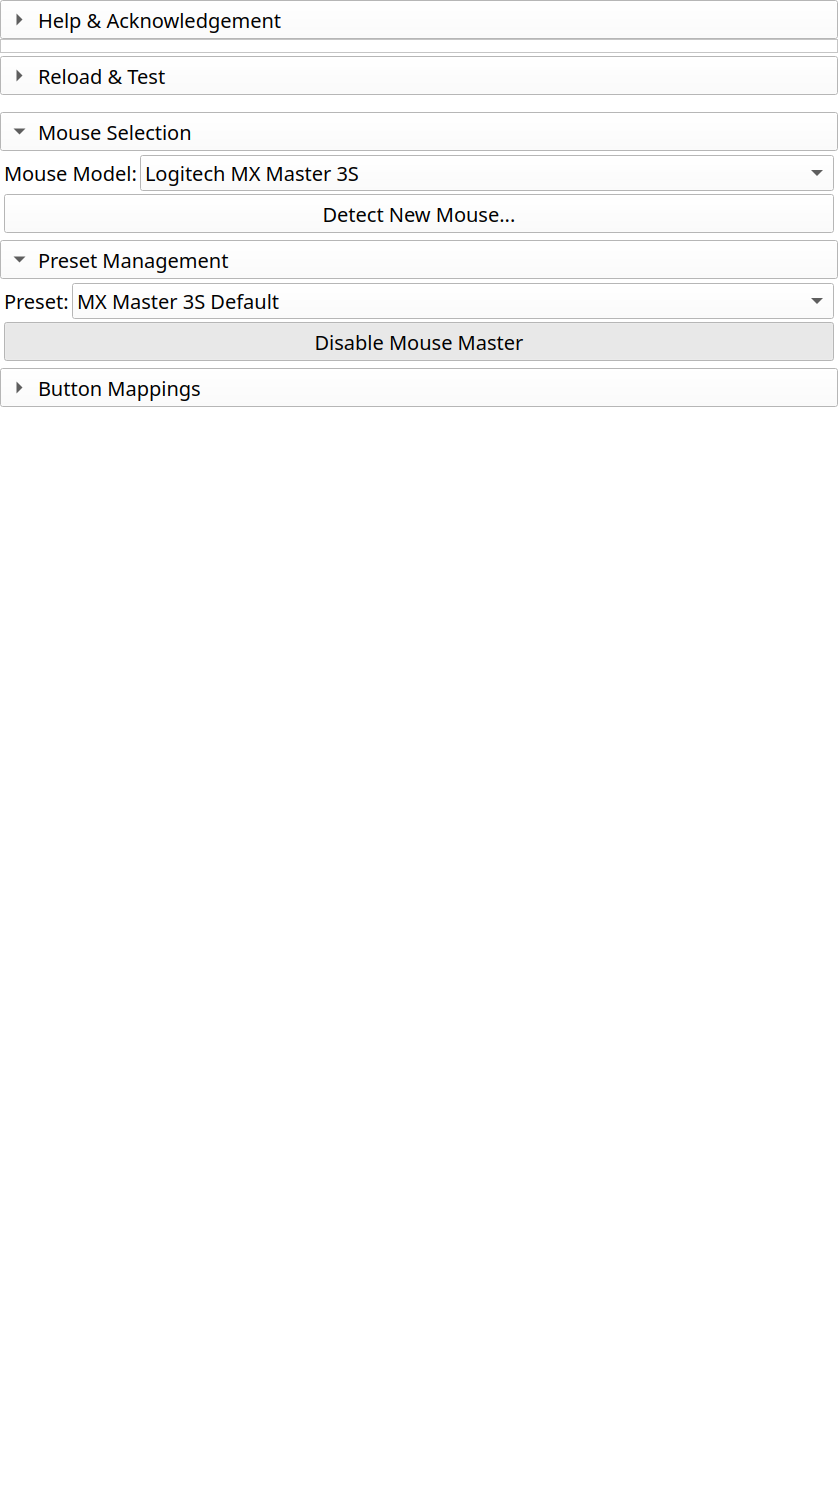
In the Preset Management section:
Select a built-in preset for your workflow, or
Click “New Preset” to create your own
Available built-in presets:
Default: Basic undo/redo on back/forward buttons
Segmentation Workflow: Optimized for Segment Editor
Markups Workflow: Quick fiducial placement
Step 4: Enable MouseMaster
Click the Enable Mouse Master button at the top of the panel.
The status indicator should turn green, showing MouseMaster is active.
Step 5: Test Your Configuration
Create a simple action in Slicer (e.g., add a markup point)
Press your mapped buttons (e.g., Back for Undo)
Verify the expected actions occur
That’s it! You’re ready to use MouseMaster.
Next Steps
Button Mapping - Customize button assignments
Presets - Save and share your configurations
Context-Sensitive Bindings - Set up module-specific bindings