Getting Started
This guide walks you through using the Adaptive Brush for the first time.
Prerequisites
3D Slicer 5.10 or later
A volume loaded (CT, MRI, etc.)
Tutorial
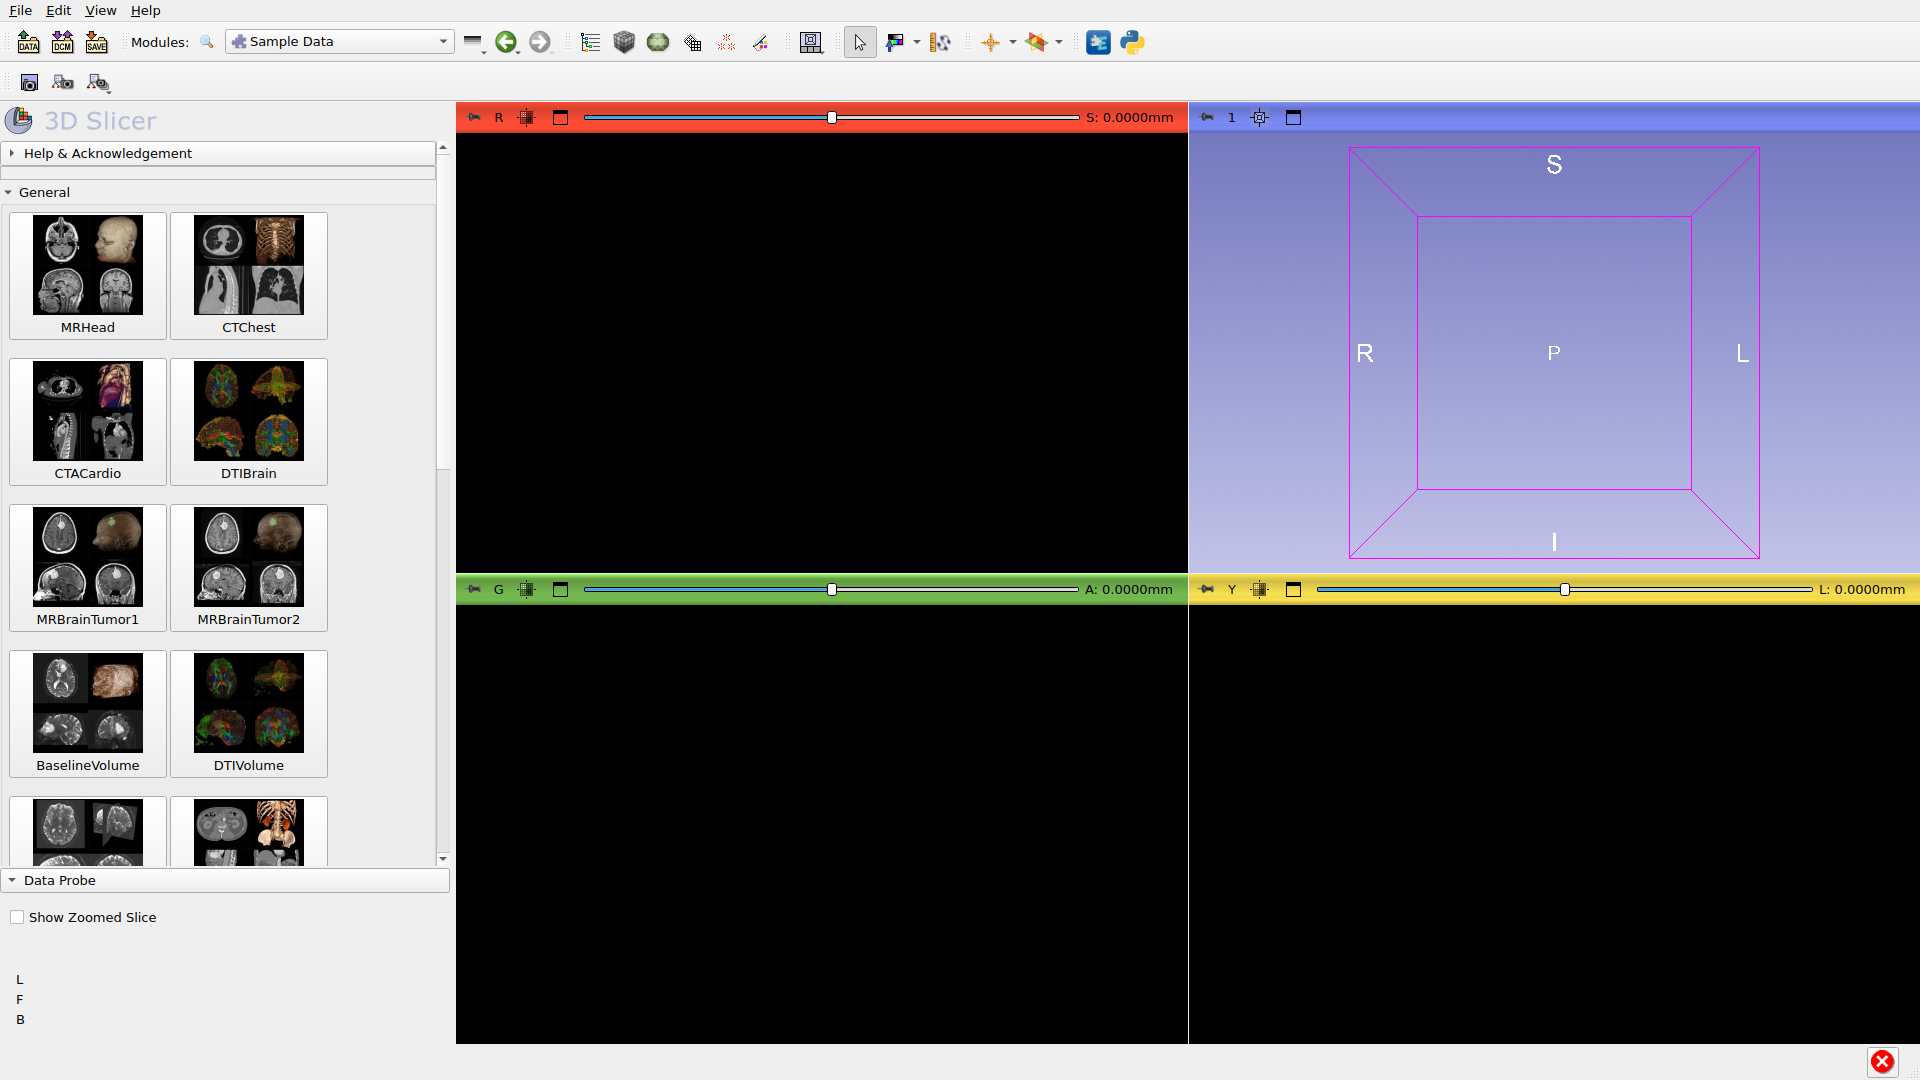
Step 1: Open Sample Data
Go to File → Download Sample Data or select the Sample Data module. This provides built-in datasets for practice.
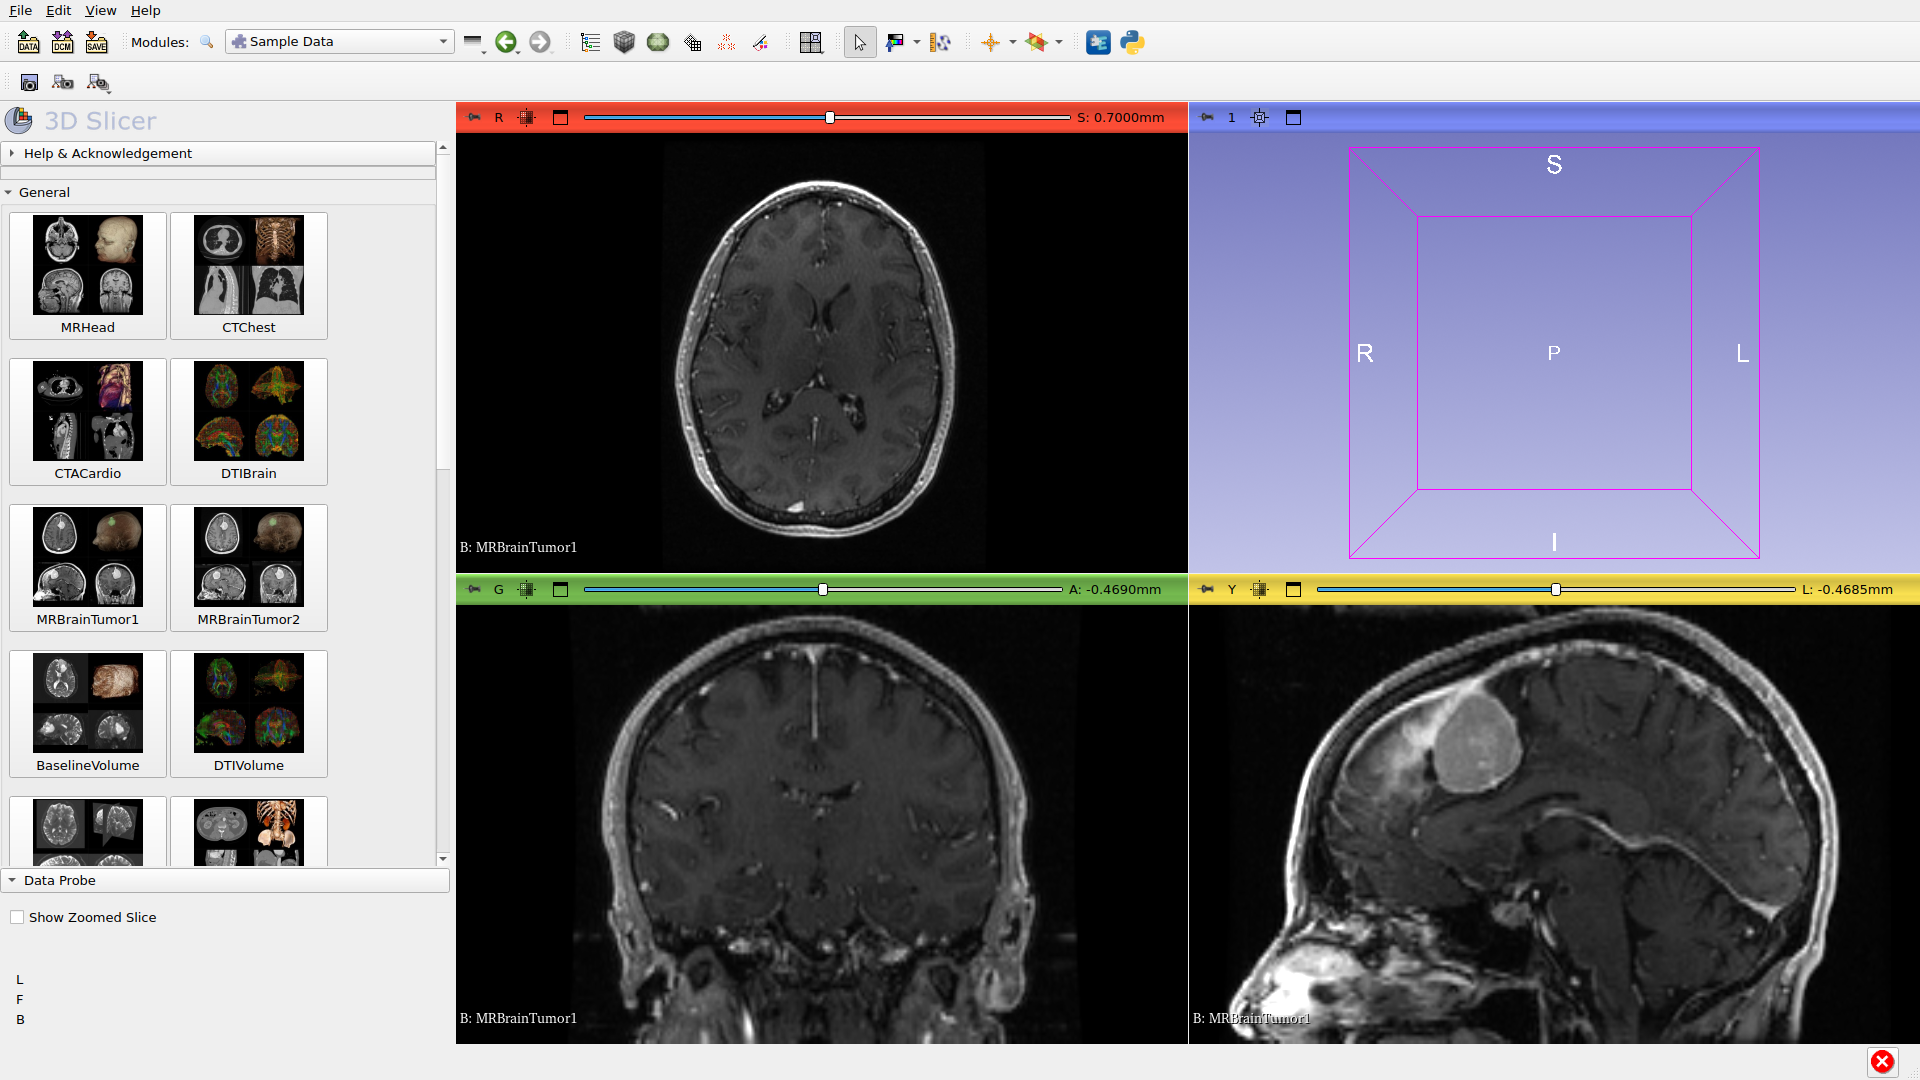
Step 2: Volume Loaded
After clicking on a dataset (e.g., MRBrainTumor1), the volume loads and displays in the slice views. This brain MRI contains a visible tumor.
Step 3: Open Segment Editor
Navigate to the Segment Editor module using the module selector or by pressing the Segment Editor button in the toolbar.
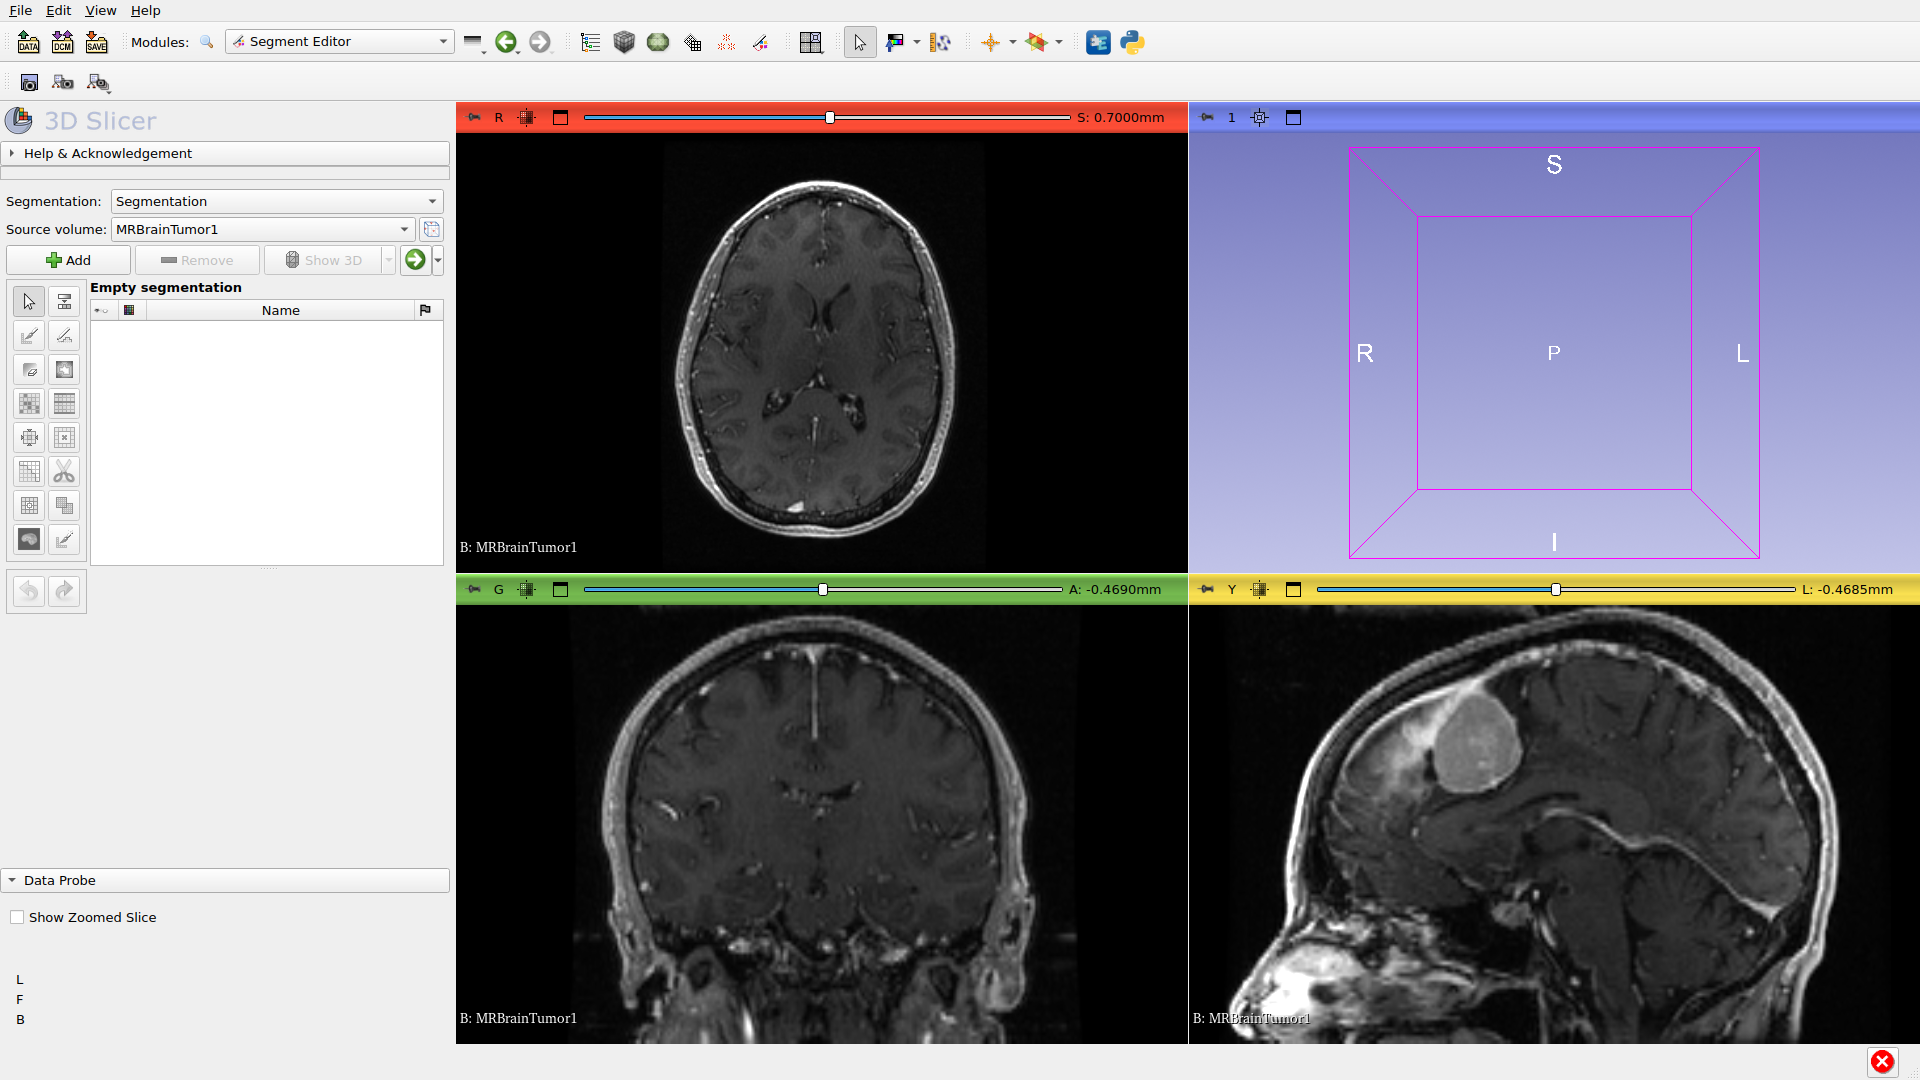
Step 4: Create Segment
Create a new segmentation and add a segment for the structure you want to segment. Click ‘Add’ to create a new segment.

Step 5: Select Adaptive Brush
Click on the Adaptive Brush effect in the effects toolbar. The options panel will show algorithm selection and brush settings.
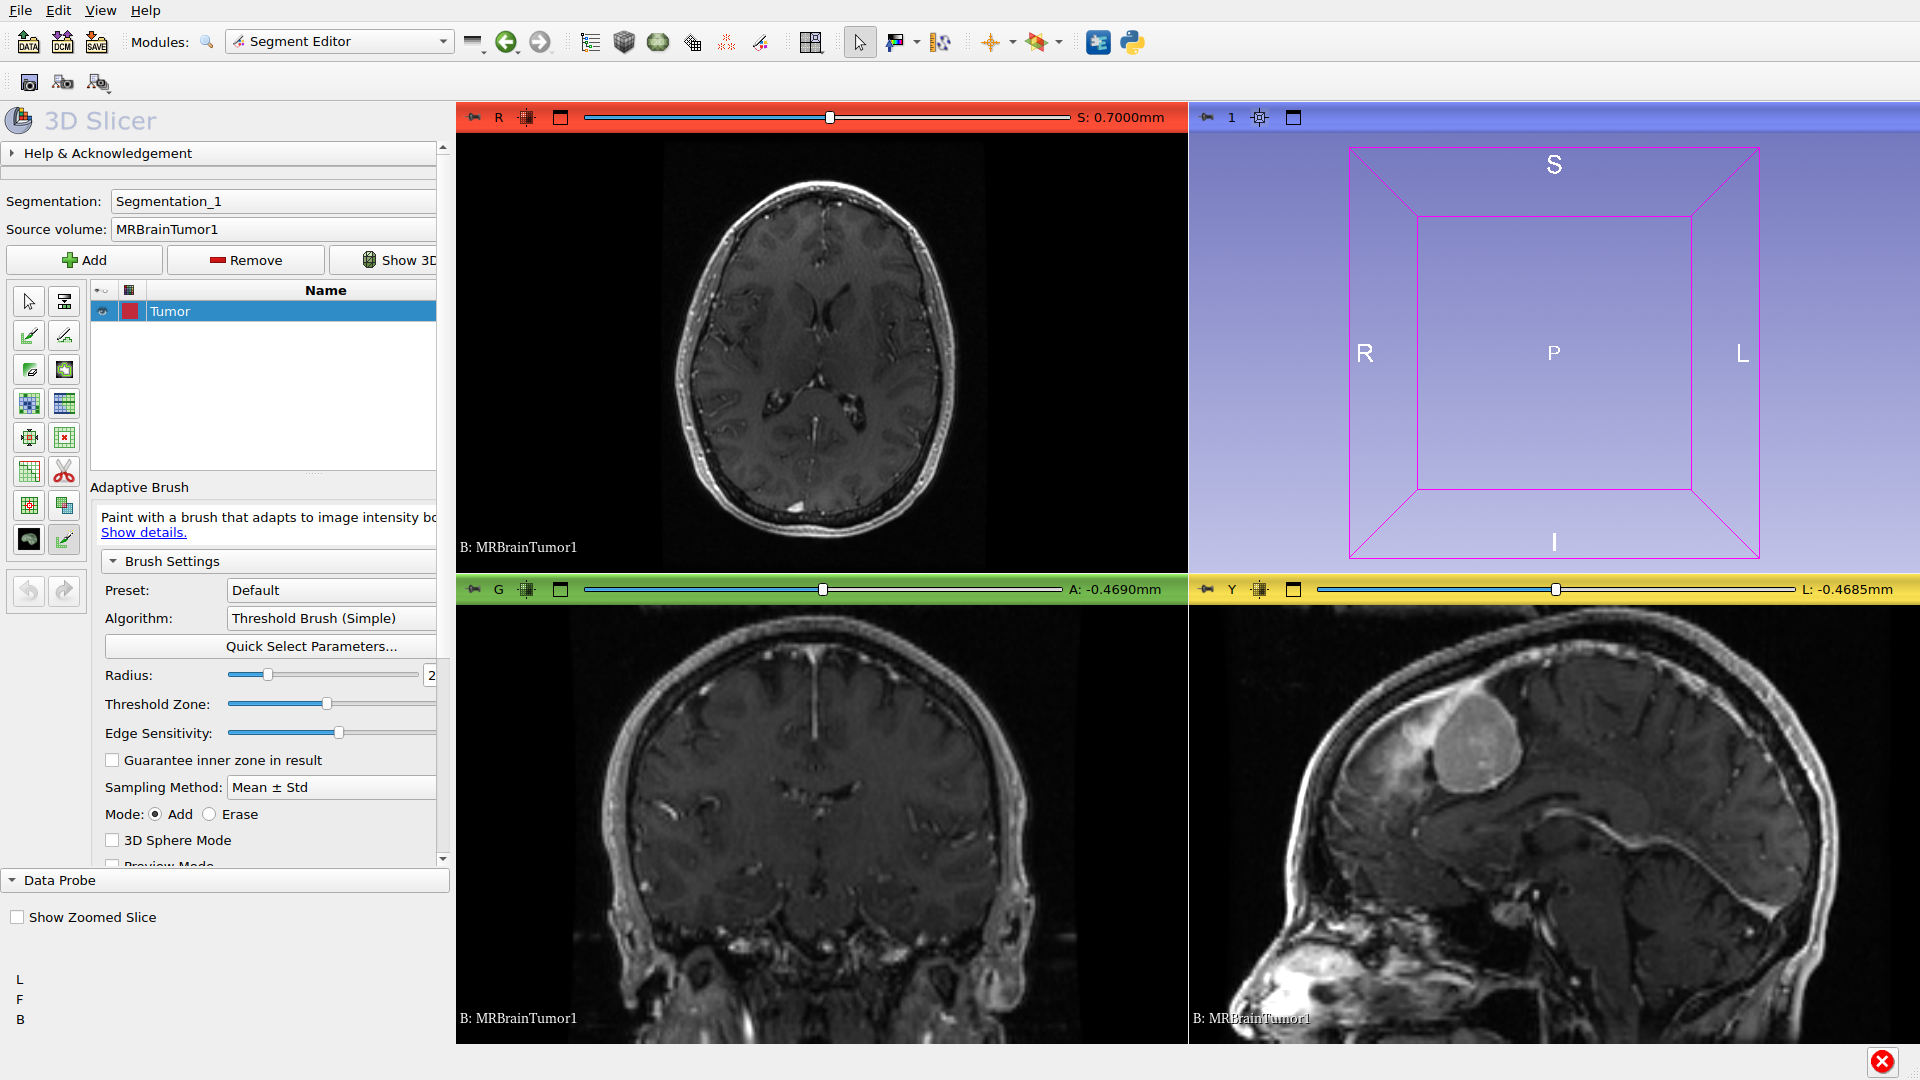
Step 6: Configure Settings
Preset: Select ‘MRI T1+Gd Tumor’ preset for contrast-enhanced tumors. Presets configure intensity thresholds automatically.
Algorithm: Select Watershed - a good general-purpose choice for tumors.
Brush Radius: Adjust with Shift + scroll wheel to match your target.
Threshold Zone: Inner circle where intensities are sampled. Smaller zone (30%) = stricter matching; larger zone (70%) = more variation. Adjust with Ctrl + Shift + scroll wheel.

Step 7: Navigate to Region
Use the slice sliders or scroll wheel to navigate to the region you want to segment. The brush preview shows where painting will occur.
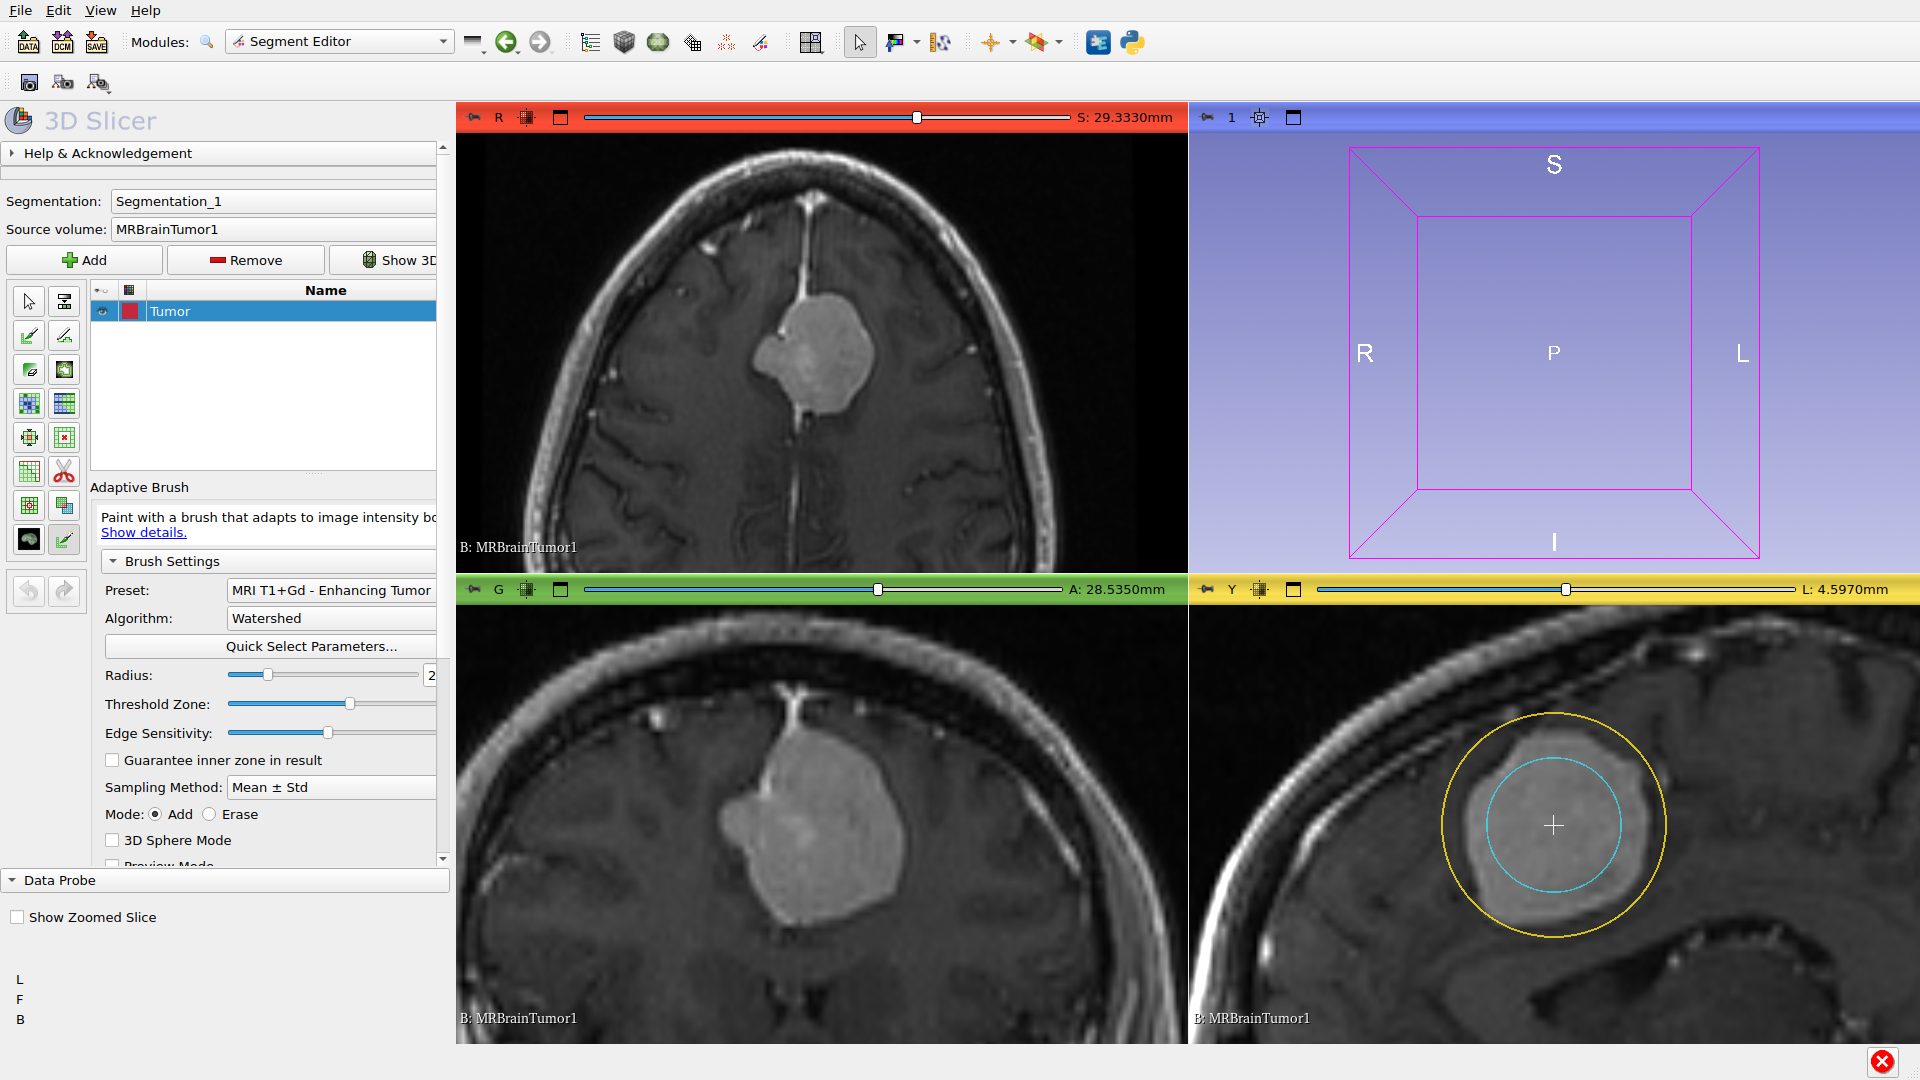
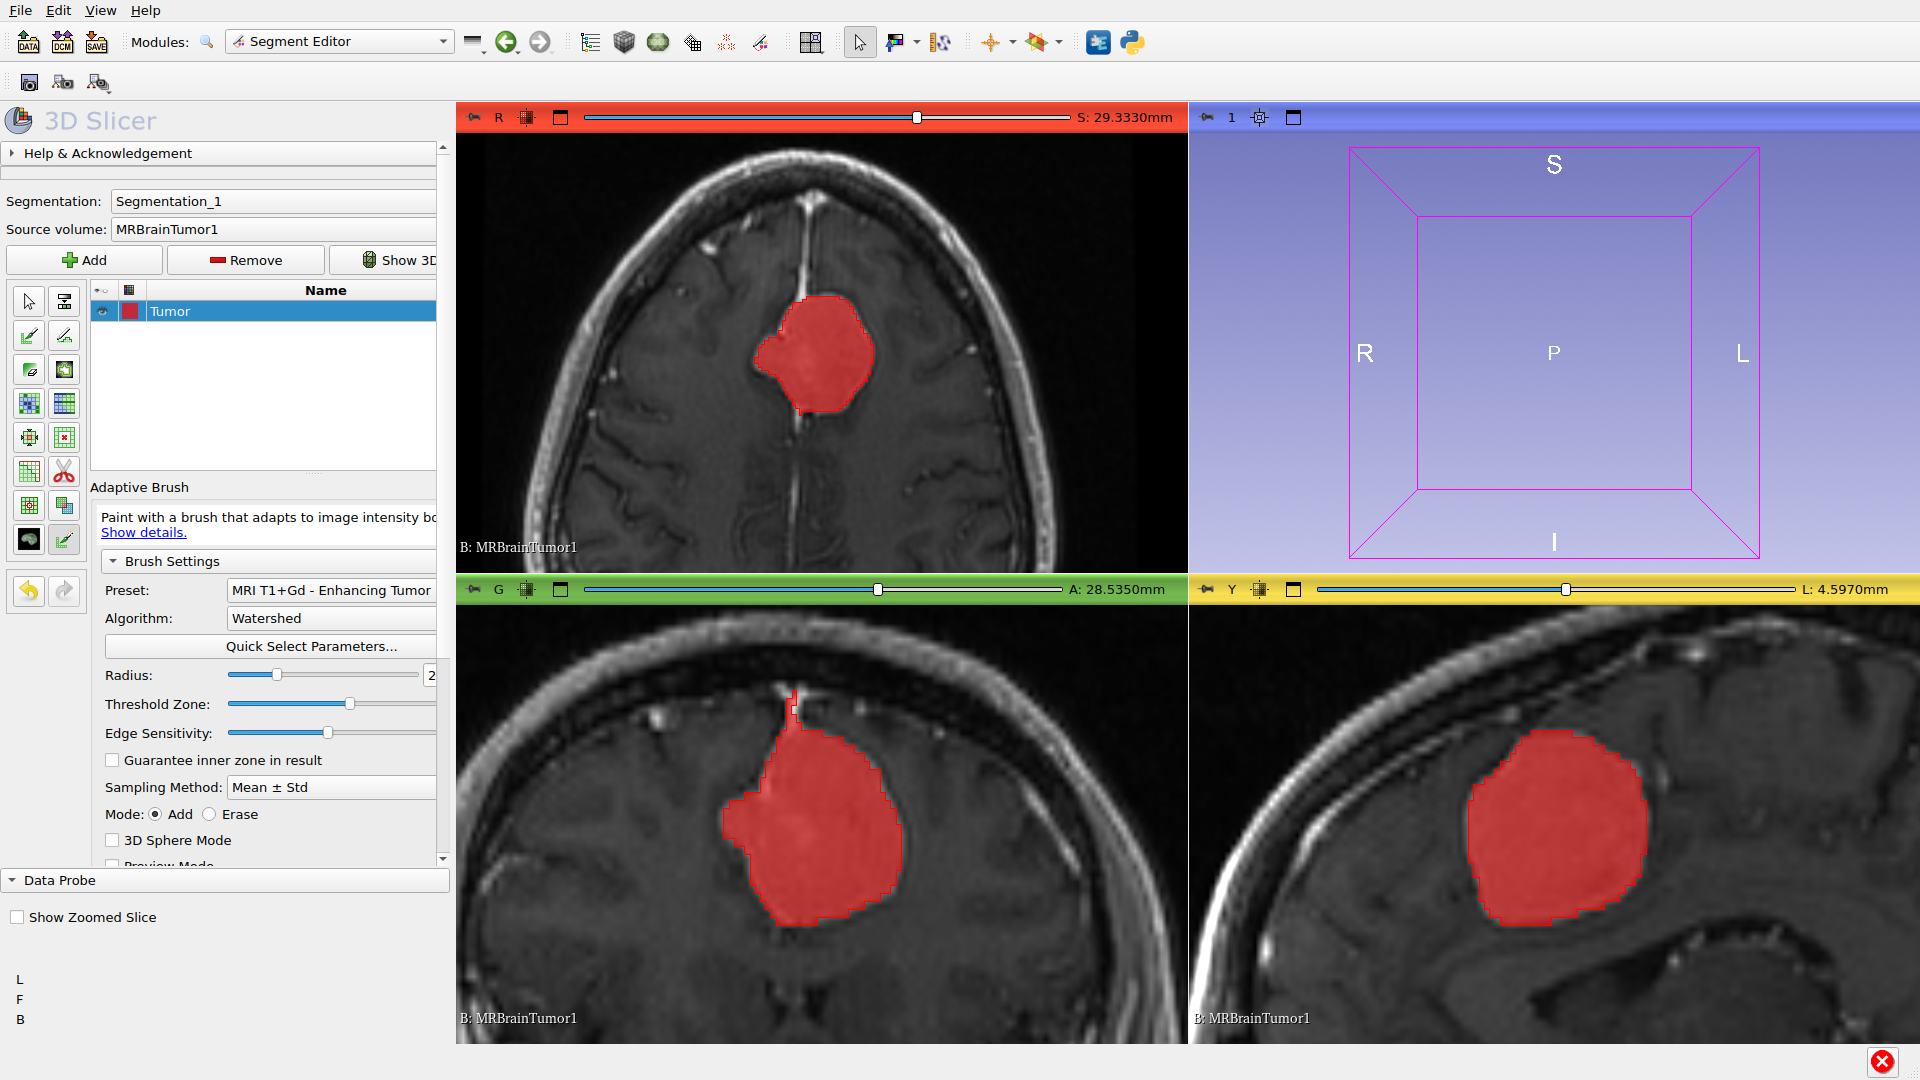
Step 8: Paint
Click on the slice view to paint. The adaptive brush automatically detects edges and segments the region based on intensity similarity. The red overlay shows the segmented area.

Step 9: Refine Segmentation
Building up: Click multiple times to extend the segmentation. Each click adds the adaptively-detected region.
Erase mode: Hold Ctrl (or Middle+Left-click) to remove areas you over-segmented. The brush will adaptively detect what to remove.
Sampling settings (in Advanced): Control how intensities are sampled:
Mean ± Std: Uses mean intensity with standard deviation range
Percentile: Uses intensity percentiles (more robust to outliers)
Gaussian weighting: Weights center pixels more heavily
Edge sensitivity: Higher values stop at weaker edges; lower values allow more permissive segmentation.
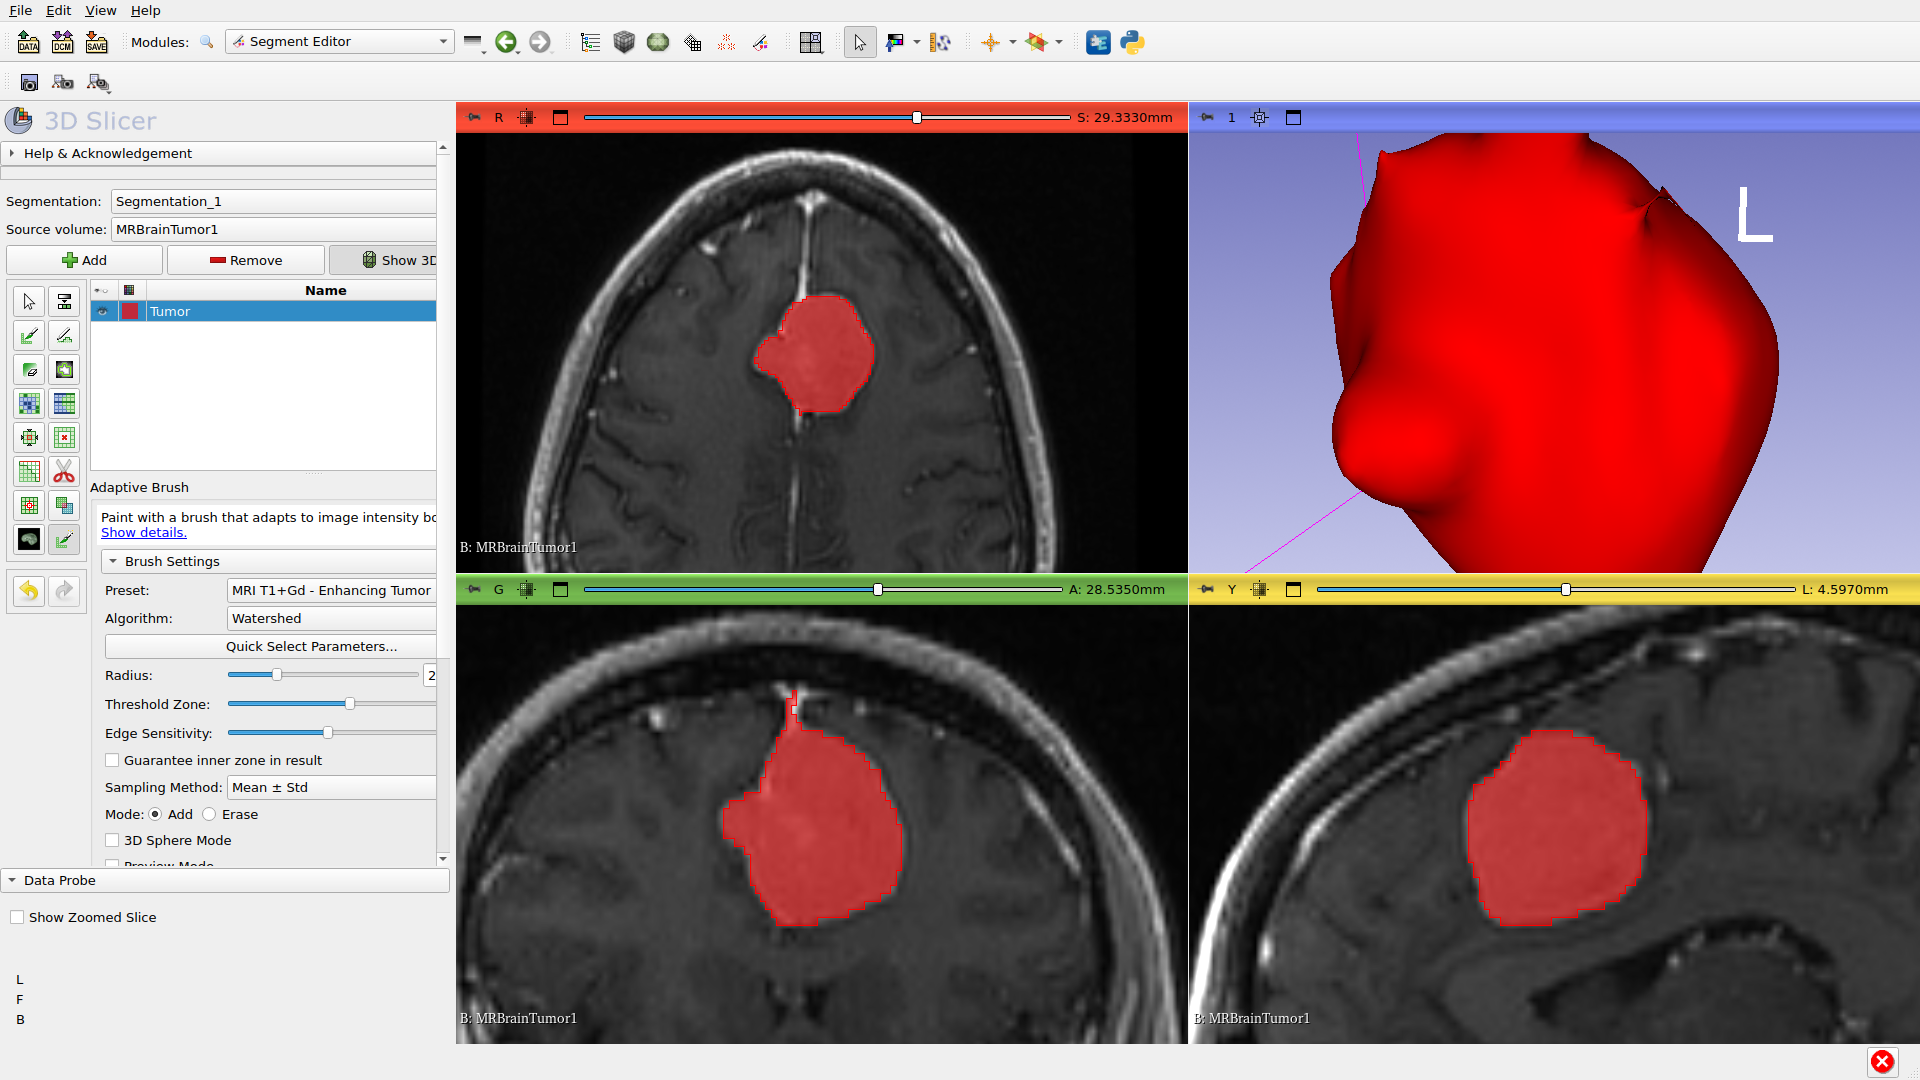
Step 10: View in 3D
The 3D view (bottom-right) shows your segmentation as a surface. The segmented region appears as a colored surface that can be rotated and examined.
Tips for Best Results
Keyboard Shortcuts
Action |
Shortcut |
|---|---|
Adjust brush size |
Shift + scroll wheel |
Adjust threshold zone |
Ctrl + Shift + scroll wheel |
Erase mode |
Ctrl + click or Middle + Left-click |
Brush Size
Start with a brush slightly smaller than your target region
Use multiple smaller strokes for complex shapes
Edge Sensitivity
Higher sensitivity = stricter edge detection (stops at faint edges)
Lower sensitivity = more permissive (may leak beyond boundaries)
Algorithm Selection
Watershed: Good general-purpose choice for most tissues
Geodesic Distance: Fast, good for structures with clear edges
Threshold Brush: Fastest, simple intensity-based painting
Presets
Use presets to quickly configure settings for common tissue types
Presets set appropriate thresholds based on imaging modality
Next Steps
Explore different algorithms
Use the Parameter Wizard for optimization
Create recipes for reproducible segmentation
This documentation was auto-generated on 2026-03-04. Screenshots reflect the current UI.